Working with Markers
A guide on how to enable Markers and how to use markers to set and edit bookmarks in your audio tracks.
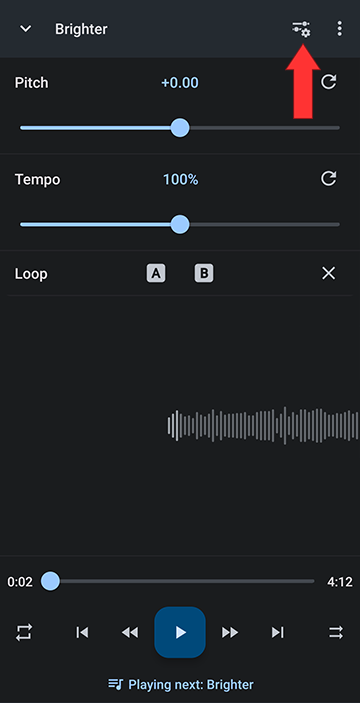
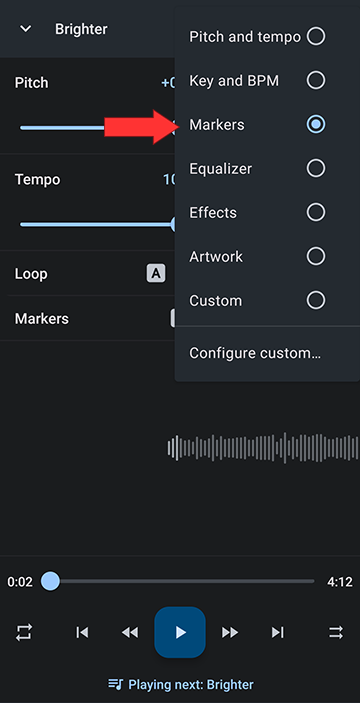
OR
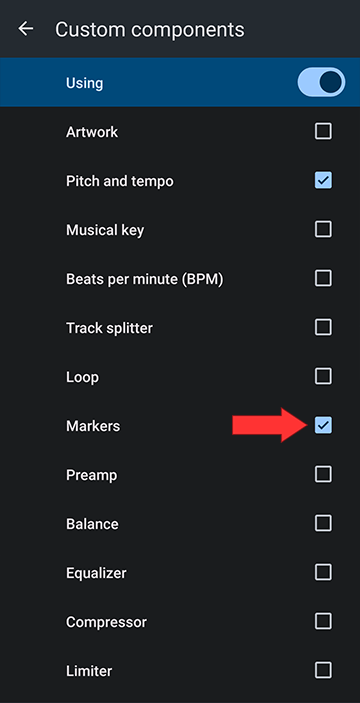
Make sure Using is on and Markers is checked
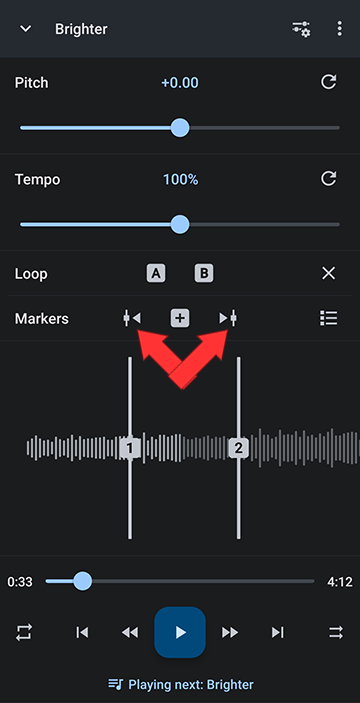
After setting Markers, the skip to marker buttons appear. You can click to seek to next or previous marker
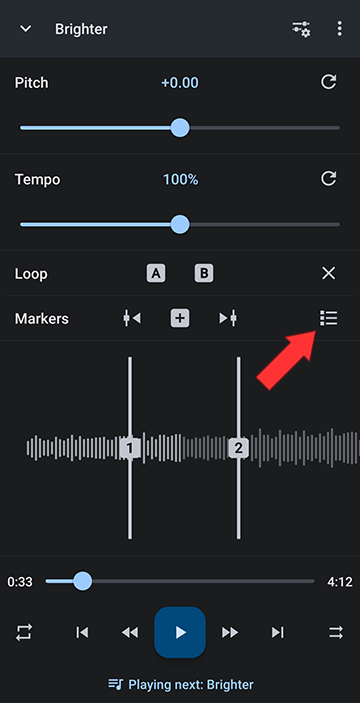
You can edit your markers by opening the markers menu
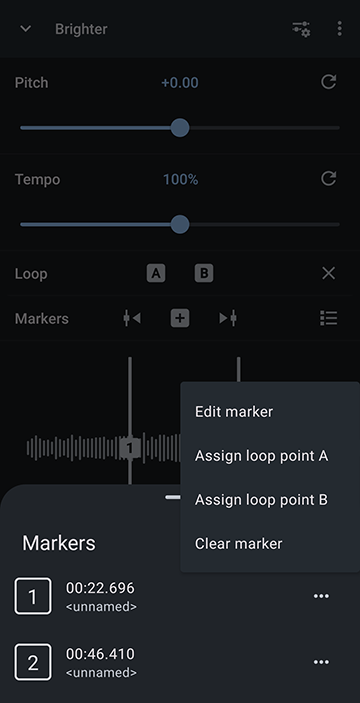
You can edit each marker by opening the marker's menu
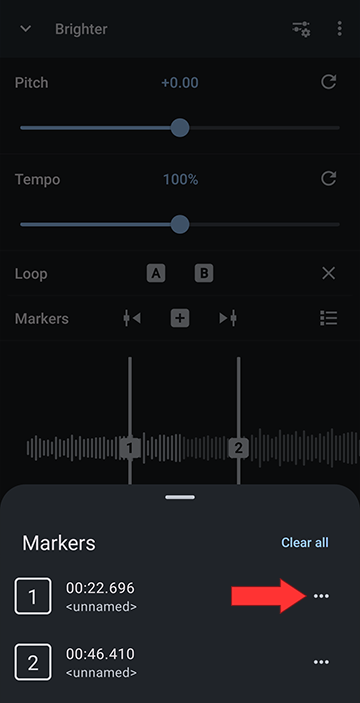
Each marker has it's own menu, from which you can adjust the time down to the milli second, name or re-name the Marker, set it as A/B point or delete it
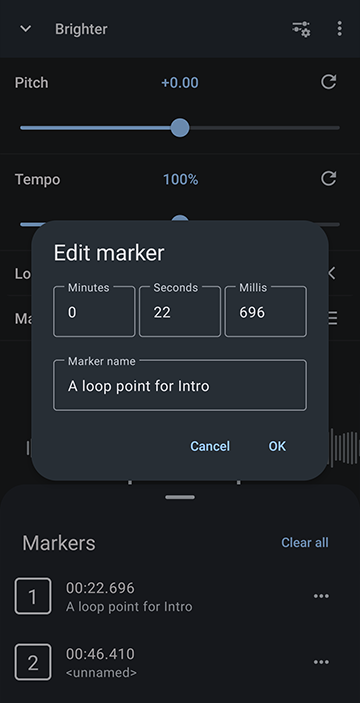
Edit name and adjust time in Edit marker
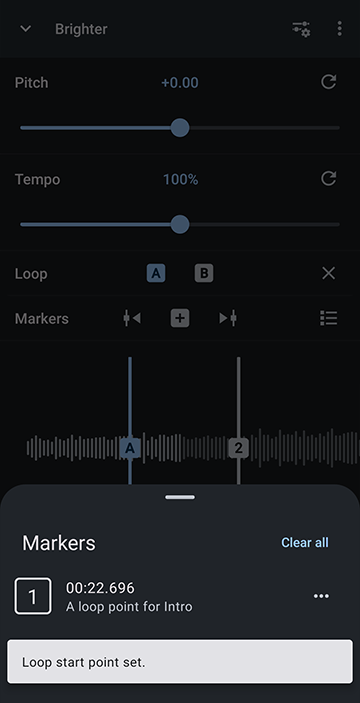
You can use the marker information and assign it to the start or end of the A/B loop. Below the first marker's information was assigned to the loop start point by selecting "Assign loop point A" from the marker's menu
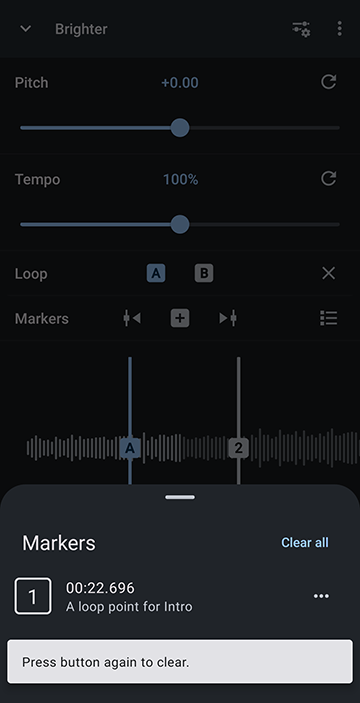
You can clear all markers by clicking Clear all twice. It is to prevent accidentally clearing all information that you have to click clear a second time after a prompt after the first click
For more information watch our Editor components Youtube video: https://musicspeedchanger.com/editor-components.php?skipLink=112
Enabling Markers in Editor components
Open the editor layout menu
Use Preset or Add to Custom
1. Using Markers Presetting
Select Markers
OR
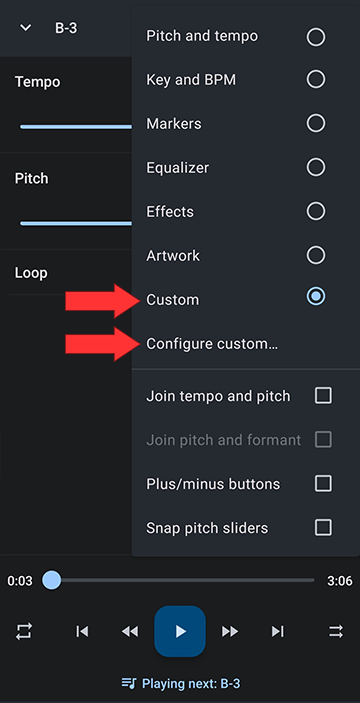
2. Adding Markers to custom setup
Select Custom and Configure custom
Make sure Using is on and Markers is checked

Working with Markers
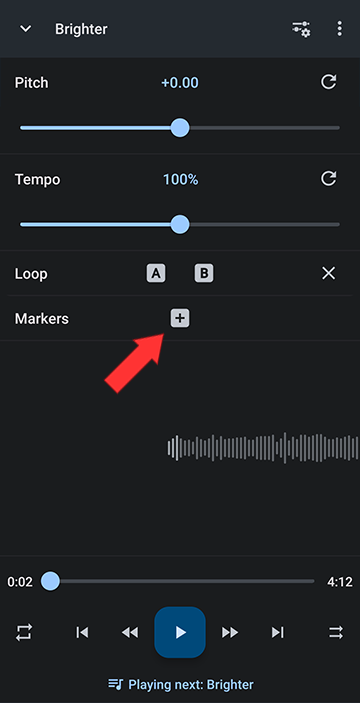
To add a Marker, click the plus button in the marker section of the editor
After setting Markers, the skip to marker buttons appear. You can click to seek to next or previous marker

You can edit your markers by opening the markers menu

You can edit each marker by opening the marker's menu

Each marker has it's own menu, from which you can adjust the time down to the milli second, name or re-name the Marker, set it as A/B point or delete it

Edit name and adjust time in Edit marker

You can use the marker information and assign it to the start or end of the A/B loop. Below the first marker's information was assigned to the loop start point by selecting "Assign loop point A" from the marker's menu

You can clear all markers by clicking Clear all twice. It is to prevent accidentally clearing all information that you have to click clear a second time after a prompt after the first click

For more information watch our Editor components Youtube video: https://musicspeedchanger.com/editor-components.php?skipLink=112
Howdy, Stranger!
It looks like you're new here. If you want to get involved, click one of these buttons!


Comments
Are they saved in any specific folder?
Thanks